
What to Check During an Annual Shingle Roof Inspection
For an annual shingle roof inspection in Brevard County, FL, start with a visual check from the ground. Look for missing or curled shingles, exposed roof areas, and debris along roof edges. From inside, check ceilings and any safely accessible attic space for stains or damp insulation. Have a roofing professional examine the flashing, vents, valleys, and other areas you cannot assess safely. IKO’s residential shingle roof inspection checklist also outlines key exterior and attic components to review. Check again after strong winds or hail rather than waiting for the next yearly visit.
The Space Coast’s sun and storms can wear shingles in different ways. A comprehensive inspection helps you spot small problems, document the roof’s condition, and decide what needs repair. Understanding the annual roof condition evaluation process also helps homeowners recognize how routine assessments fit into a broader maintenance plan.

Why an Annual Shingle Roof Inspection Matters for Homeowners
A residential roofing system serves as the primary barrier against tropical weather, wind-driven rain, and persistent sun exposure. Staying proactive with routine assessments safeguards roof longevity and protects the underlying building envelope from moisture intrusion. Over time, heat and humidity cause asphalt binding agents to dry out, while coastal gusts work at the edges of protective tabs. Homeowners who prioritize preventative roof maintenance can catch early deterioration before structural rafters or interior ceilings suffer water damage.
Routine reviews also support storm resilience and manufacturer warranty compliance. Most shingle manufacturers specify that roofing systems must be maintained according to standard industry practices, such as those outlined by the National Roofing Contractors Association, to keep warranty coverage intact. Learning about extending roof life in extreme heat gives property owners practical insights on managing UV degradation across neighborhoods in Melbourne, Palm Bay, and Rockledge.
How Preventative Care Extends Shingle Roof Lifespan
Asphalt shingles age under relentless ultraviolet radiation and sudden temperature shifts. Standard 3-tab shingles generally offer an operational lifespan of 15 to 20 years, whereas architectural shingles can last 20 to 30 years under balanced conditions. Without periodic assessments, unaddressed nail pops, dried sealants, or minor wind uplift can cut that operational window short.
Preventative care identifies minor vulnerabilities before water bypasses the underlayment. Securing loose tabs, clearing biological debris, and refreshing flashing seals keeps the protective water-shedding system functioning as intended. Extending the life of an existing installation by several seasons provides a substantial return on investment compared to the capital required for premature replacement.
Financial Impact: Early Detection vs. Major Leak Repairs
Neglecting minor roofing defects often leads to compounded repair expenses. A failed pipe boot or lifted shingle tab may allow water to seep slowly into the attic space over months, rotting plywood decking, saturating insulation, and ruining drywall finishes before any drip reaches the living area.
| Issue Identified | Early Detection Scope | Deferred Damage Scope | Typical Secondary Impacts |
|---|---|---|---|
| Plumbing Pipe Boot Failure | Reseal or replace collar boot | Replace decking, insulation, and ceiling drywall | Attic mold growth, ceiling staining |
| Lifted or Cracked Shingle | Fasten and reseal individual tab | Structural framing repair and multiple-square reroof | Saturated insulation, interior finish damage |
| Compromised Valley Flashing | Clean channel and reseal seams | Reroof valley, replace rotted valley rafter | Fascia rot, structural substrate decay |
| Blocked Eave Drainage | Clear debris and realign pitch | Rebuild rotted fascia boards and soffit panels | Foundation erosion, siding moisture intrusion |
Addressing maintenance needs early keeps upkeep manageable. When localized issues are deferred, the financial impact multiplies quickly across structural framing and interior finishes.
Complete Exterior Checklist for Shingle Roofs
A thorough exterior evaluation requires an organized review from the roof edge up to the ridge cap. Exterior components work together as an integrated system, meaning failure at a single junction can compromise nearby sections.
Shingle Condition and Granule Loss Evaluation
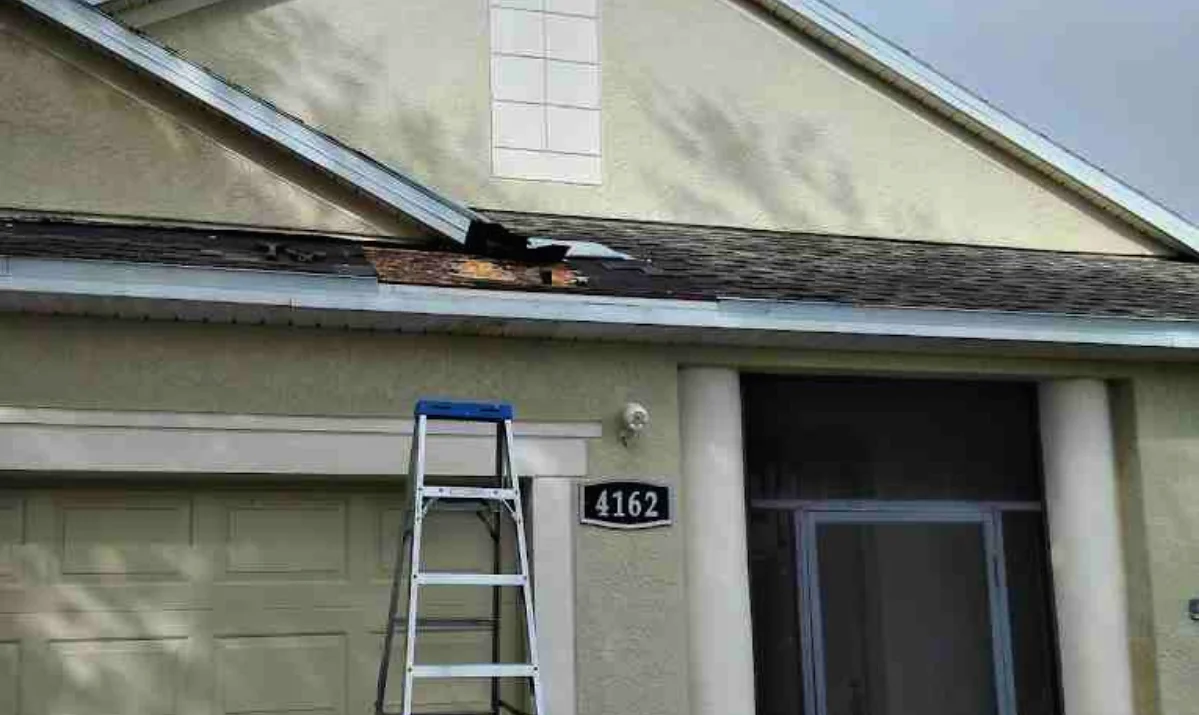
Shingle granules shield the asphalt layer from sunlight and physical impact. As shingles weather, these protective granules loosen and wash into drainage systems. Reviewing our guide to shingle granule loss highlights how bald spots leave the underlying asphalt exposed to rapid drying and cracking.
During an inspection, examine the field of the roof for:
- Curling or cupping edges: Indicates advanced age or thermal stress.
- Surface cracking: Asphalt layer drying out and losing flexibility.
- Missing or torn tabs: High wind uplift tearing shingles at fastener lines.
- Nail pops: Fasteners backing out through the shingle surface due to deck expansion.
- Biological growth: Understanding proper algae staining identification prevents unnecessary abrasive scrubbing that strips protective granules.
Flashing, Penetrations, and Roof Valleys in an Annual Shingle Roof Inspection
Flashing materials channel water away from roof intersections and vertical wall junctions. Because metal expands and contracts at different rates than asphalt shingles, flashing transitions represent common leak points.
- Plumbing Vent Boots: Rubber boots degrade from UV exposure, leading to cracks around pipe collars.
- Step and Counter Flashing: Installed along exterior walls and chimneys; requires sound mortar joints and intact sealant beds.
- Drip Edge: Fastened along the eaves and rakes to direct runoff cleanly into drainage channels without wetting wood fascia.
- Roof Valleys: Intersecting roof planes carry heavy water volume. Valleys must remain clear of leaf litter, with no lifted shingles or rusted open metal pans.
Fascia, Soffits, and Roof Drainage Systems
Drainage systems and downspouts direct rainwater away from structural foundations and exterior walls. During an evaluation, look inside drainage channels for thick accumulations of shingle granules, which signal accelerated wear across upper roof planes. Check that downspouts drain freely away from the home. Misaligned or blocked drainage channels can spill water backward behind the fascia board, leading to hidden wood rot and deteriorated soffit vents across homes in Viera and West Melbourne.
Interior and Attic Assessment: Spotting Hidden Roof Leaks
An exterior check tells only half the story. The underside of the roof deck inside the attic provides clear evidence of water penetration long before moisture stains appear on living room ceilings.

When evaluating the attic space, bring a high-lumen flashlight and examine:
- Daylight Penetration: Visible light through roof decking boards indicates gaps around vent pipes, valleys, or displaced shingles.
- Decking Discoloration: Dark streaks, water stains, or white efflorescence on plywood sheathing highlight chronic moisture intrusion.
- Insulation Condition: Saturated or compressed attic insulation loses thermal resistance and points directly to overhead leaks.
- Mold or Mildew: Persistent dampness accompanied by musty odors suggests trapped moisture or active water ingress.
- Ventilation Balance: Ensure soffit baffles, ridge vents, and off-ridge exhaust vents remain unobstructed to allow proper airflow and prevent excessive heat buildup.
Professional vs. DIY Roof Evaluation: Methods and Costs
Homeowners can easily carry out visual evaluations from the ground using binoculars or by checking open attic spaces. However, climbing onto elevated roof surfaces presents real fall hazards and can inadvertently damage aging shingles. A professional roofing contractor brings specialized safety equipment, field experience, and advanced diagnostic tools to the evaluation.
Professional vs. DIY Steps for an Annual Shingle Roof Inspection
A formal inspection by an experienced contractor produces an objective condition report detailing shingle integrity, flashing life expectancy, and necessary maintenance tasks. Reviewing typical roof inspection costs helps homeowners understand the value of diagnostic tools like high-resolution drone photography and attic thermal moisture scanning.
When organizing records for property coverage or real estate transactions, reviewing standard insurance inspection guidelines ensures all documentation meets carrier criteria. Professional evaluations categorize findings into items to monitor, recommended near-term maintenance, and active leaks requiring prompt repairs.
When to Schedule and Seasonal Timing Considerations
The ideal cadence for roof assessments follows seasonal weather patterns. Scheduling an inspection in late spring ensures the roofing system is prepared for summer tropical systems, while a follow-up assessment in late autumn evaluates any wear sustained during the storm season.
It is also wise to check the roof following severe local weather events involving high wind gusts or hail. Performing prompt evaluations helps homeowners catch displaced shingles or damaged ridge caps early, keeping moisture out of the home.
Frequently Asked Questions About Roof Inspections
How often should a shingle roof be inspected?
Most residential roofs benefit from a formal professional inspection at least once per year, supplemented by quick homeowner checks from the ground after major storms. For newer roofs under 10 years old, an inspection every one to two years is often sufficient. Once a shingle roof passes 12 to 15 years of service on the Space Coast, annual evaluations become critical to catch seal failures, worn pipe boots, and granule thinning before interior leaks occur.
What factors influence the cost of a professional roof inspection?
Inspection costs vary based on several property factors, including total roof square footage, roof pitch, multi-story accessibility, and the diagnostic tools used. A basic ground and ladder review carries a different cost structure than an evaluation incorporating aerial drone photography or infrared moisture scans. When repairs are needed, overall pricing depends on the scope of work, material choices, and underlying deck condition, which can be confirmed through an in-person assessment.
What immediate steps should I take if an inspection reveals roof damage?
If an evaluation uncovers active water intrusion or displaced shingles, take these steps right away:
- Protect Interior Living Spaces: Place buckets beneath drips and move furniture away from vulnerable drywall areas.
- Mitigate Further Intrusion: Arrange for temporary emergency tarping if shingles are missing or flashing has pulled away.
- Document the Area: Take clear photos of both interior water marks and exterior shingle issues.
- Consult a Licensed Roofer: Refer to the expert guide to roof repair and maintenance and schedule a licensed contractor to evaluate whether localized repairs or broader system updates are needed.
Conclusion
Carrying out an annual shingle roof inspection across Brevard County, FL protects your home from costly interior leaks and preserves structural integrity against coastal weather. Whether you live in Melbourne, Palm Bay, Merritt Island, Rockledge, or Sebastian, catching minor shingle wear, deteriorated vent boots, and flashing gaps early adds years to your roof’s working lifespan.
For comprehensive assessments, storm damage mitigation, and dependable shingle repairs, turn to MLG Roofing. Homeowners can easily schedule residential roofing services with our experienced team to keep their homes secure year-round.