
How to Check for High Wind Roof Damage After a Storm
After a storm in Brevard County, FL, check for high wind roof damage from the ground. Look for missing or lifted shingles, loose flashing, damaged roof trim, and debris on the roof. Then check ceilings and the attic for new water stains. Take photos of what you find, but do not climb onto the roof.
If water is entering the home, move belongings away from the leak and call a roofing professional to assess the damage and arrange temporary protection. The checklist below will help you inspect safely and keep a clear record of what changed after the storm.
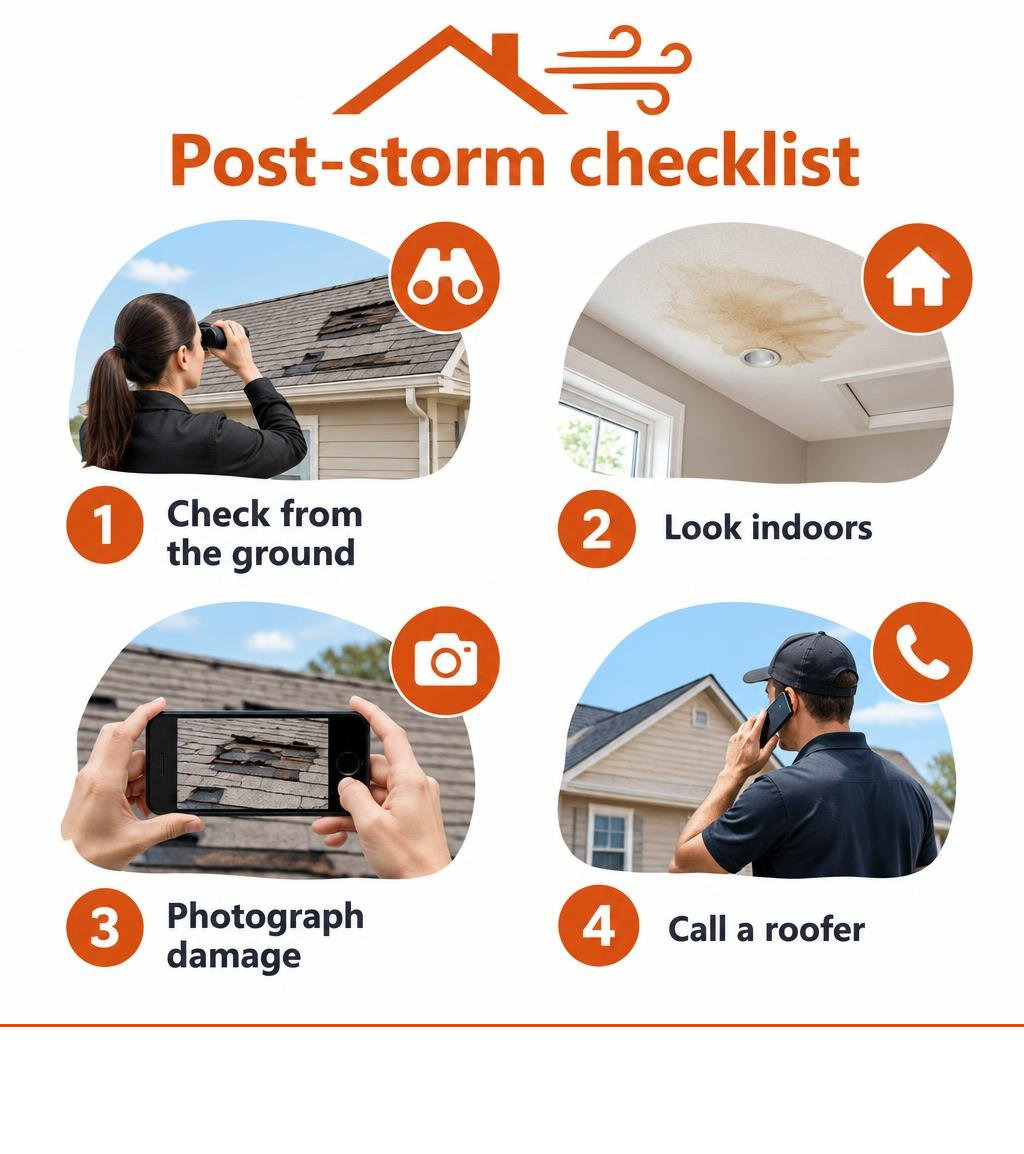
To identify specific storm impacts, homeowners can review indicators of wind damage to roof coverings across the Space Coast. Evaluating a hurricane damaged roof shingle helps determine whether spot repairs or larger interventions are necessary, while hidden leaks without obvious shingle loss often stem from wind driven rain intrusion.
Understanding the Aerodynamics of High Wind Roof Damage
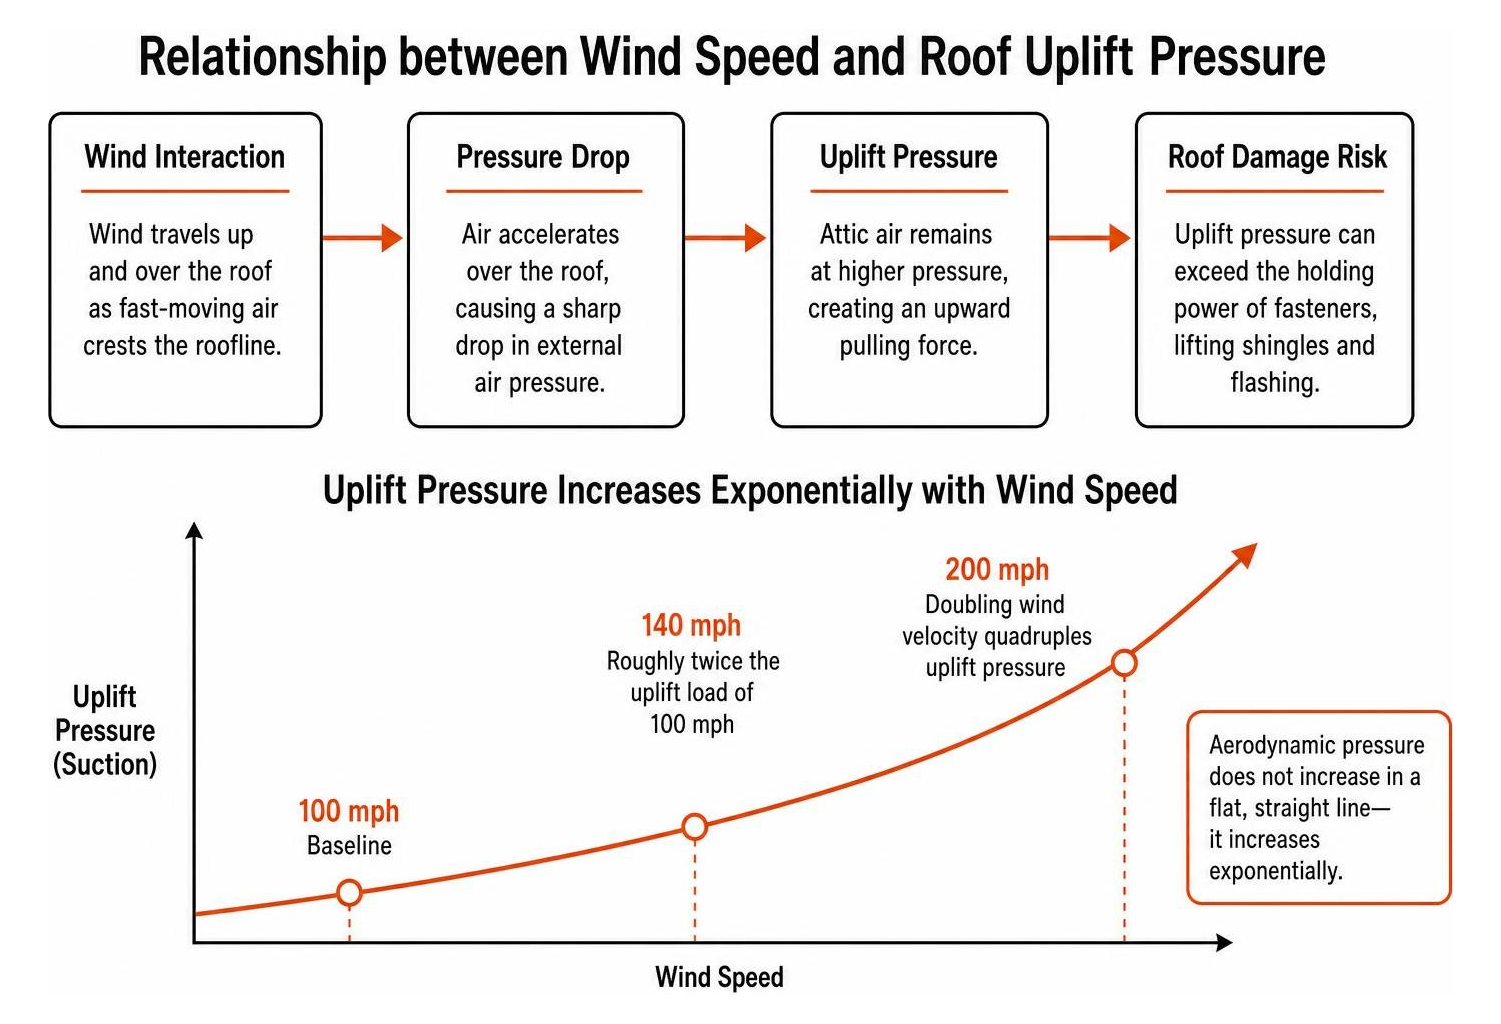
When severe weather rolls off the Atlantic or sweeps across the Indian River Lagoon, wind interacts with residential structures in complex aerodynamic ways. Wind does not simply push against the side of a home; it travels up and over the building, creating intense changes in air pressure. As fast-moving air crests the roofline, it accelerates, causing a sharp drop in external air pressure according to the Bernoulli principle. Because the air inside the attic remains at a higher pressure, an upward pulling force known as uplift pressure is generated.
This differential suction acts like an industrial vacuum on your roofing materials. In tropical storms, severe thunderstorms, and hurricanes, this uplift force can exceed the holding power of standard nails and adhesive strips. Wind blowing across peaks and corners also generates turbulent, low-pressure vortices—swirling mini-cyclones along roof edges that aggressively pry shingles, metal panels, and flashing away from the wooden decking.
| Wind Speed Threshold | Typical Roof Impacts | Primary Failure Modes |
|---|---|---|
| 40–50 mph | Light material movement, loosening of older installations | Unsealing of shingle adhesive strips, vibration and loosening of edge flashing |
| 55–70 mph | Moderate to severe damage across vulnerable zones | Shingle tabs creasing and breaking, fascia detachment, localized membrane peeling |
| 70+ mph (Hurricane Force) | Significant structural displacement, widespread water intrusion | Large sections of decking exposed, complete roof covering blow-off, major flashing loss |
How Wind Velocity and Pitch Accelerate High Wind Roof Damage
Wind speed and roof design interact to dictate how much uplift force a building envelope must endure. Aerodynamic pressure does not increase in a flat, straight line as wind speeds climb—it increases exponentially. Doubling wind velocity actually quadruples the uplift pressure exerted on the roof structure. For example, a 140-mph gust exerts roughly twice the destructive uplift load of a 100-mph gust.
Roof pitch and overall geometry also play a decisive role in whether air flows smoothly or creates destructive suction:
- Hip Roofs: Built with four sloping sides meeting at a central ridge, hip roofs present a streamlined profile from any wind direction. They naturally deflect oncoming gusts up and over, significantly reducing uplift loads compared to vertical wall profiles.
- Gable Roofs: Featuring flat, vertical triangular ends, gable designs create severe resistance. Wind hitting a gable wall is forced straight upward over the edge, creating powerful negative pressure zones that frequently peel back rakes and eaves.
- Low-Slope Roofs: Low pitches (roughly 10° to 15°) often sustain extreme aerodynamic suction across their windward slopes. As detailed in the aerodynamic analysis of hurricane roof damage, low angles cause rushing air to accelerate right at the leading edge, multiplying uplift forces on fasteners and underlayments.
Vulnerable Roof Zones: Perimeter, Eaves, and Ridges
Roof failure rarely begins in the center of a roof slope. Instead, it almost always starts at the outer edges, where wind turbulence is at its highest. Modern wind engineering divides a roof into three distinct pressure zones: Zone 1 (the central field), Zone 2 (the perimeters and ridges), and Zone 3 (the corners).
According to FM Global engineering guidelines on roof windstorm protection, uplift pressures at roof corners (Zone 3) can be more than 2.5 times higher than in the central field, while perimeter edges (Zone 2) experience over 1.5 times the field pressure.
When a storm strikes, wind catches the metal drip edge along the eaves. If that metal is not properly fastened, the vortex peels the flashing upward, breaking the adhesive seal of the starter shingle course. Once the leading edge is compromised, wind catches the underside of subsequent layers, peeling them back in a cascade. Similarly, unbaffled ridge vents and loose soffits can collapse or blow out under localized pressure changes, allowing wind-driven rain to pour directly into the attic envelope.
The Step-by-Step Post-Storm Roof Inspection Checklist
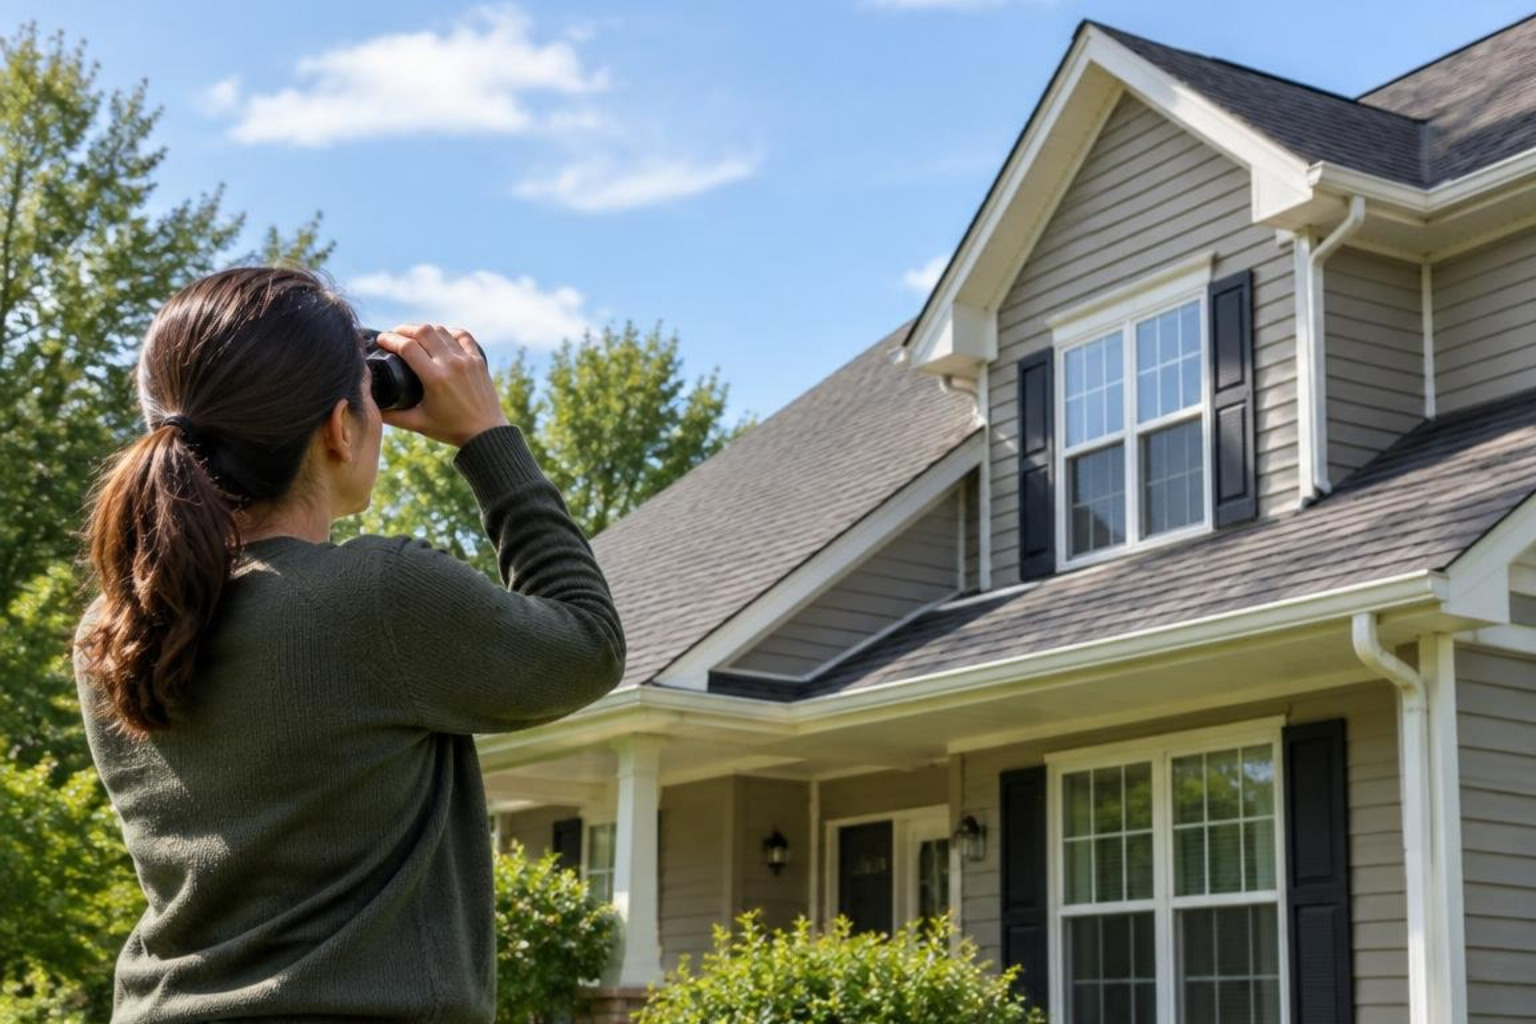
Once a storm has completely cleared and it is safe to go outside, you should perform an initial assessment. Safety is paramount: never walk on a storm-damaged, wet, or steep roof. Slippery surfaces, hidden structural weak points, and nearby downed electrical lines create severe hazards.
You can perform a thorough, informative preliminary inspection right from your yard using a set of binoculars, a smartphone camera, and a high-powered flashlight. A detailed storm damage roof assessment guide provides helpful step-by-step procedures before starting your perimeter walk.
Ground-Level Exterior and Perimeter Inspection
Walk around the entire perimeter of your home at multiple distances to capture different roof angles:
- Missing or Blown-Off Shingles: Look for dark, exposed patches of black underlayment or bare wood sheathing where shingle tabs have torn away.
- Lifted and Unsealed Shingles: Use binoculars to scan horizontal shingle courses. Shingles that appear slightly raised, warped, or out of alignment have likely suffered adhesive seal failure from wind uplift.
- Flashing and Metal Components: Check the metal valleys, chimney flashing, plumbing vent boots, and edge metal. Look for bent, lifted, or missing sections.
- Downspout Runoff and Granule Accumulation: Inspect your drainage exit points. While some granule shedding occurs over time, heavy piles of mineral granules after a storm indicate that high-velocity winds scoured the shingle surface.
- Soffit and Fascia Integrity: Look under the eaves for loose, sagging, or completely detached soffit panels and displaced fascia wrap.
Interior Attic and Ceiling Moisture Checks
A roof covering can sustain wind damage that allows water to enter without immediately showing a visible drip in your living room. Take a bright flashlight into your attic space to look for hidden moisture:
- Decking Stains and Discoloration: Look upward at the underside of the plywood or OSB roof sheathing. Dark spots, water rings, or damp streaks indicate water penetrating through lifted shingles or failed fastener penetrations.
- Daylight Infiltration: Turn off your flashlight for a moment. If you see pinpoint rays of daylight penetrating the roof deck (outside of designed ventilation openings), the exterior covering has been breached.
- Insulation and Framing Dampness: Feel around the top of the insulation batting directly below valleys, roof hips, vents, and chimneys. Wet insulation loses its thermal resistance and indicates a slow, concealed leak path.
Differentiating High Wind Roof Damage from Normal Wear and Tear
Insurance adjusters evaluate roofs carefully to determine whether damage resulted from sudden storm peril or ongoing age-related deterioration. Understanding these distinctions helps set clear expectations:
- Wind Damage Characteristics: True wind damage creates sharp, distinct failure points. Asphalt shingles lifted by wind develop straight horizontal crease lines across their tops where the shingle bent backward. You may also see fractured fiberglass mats, mechanical tears near fastener lines, and shingles cleanly ripped from their nail patterns.
- Normal Wear and Tear: Aging shingles show uniform deterioration across entire roof planes. This includes surface blistering (small pimples from outgassing asphalt), wide thermal cracking patterns spanning multiple directions, generalized edge curling from decades of sun exposure, and widespread, uniform bald spots caused by long-term UV degradation.
As outlined in forensic engineering standards for residential roof damage, identifying the precise mechanical stress marks—such as localized tab uplift versus heat-related brittleness—is the foundation for documenting authentic storm claims.
Immediate Action Plan and Navigating Insurance Claims
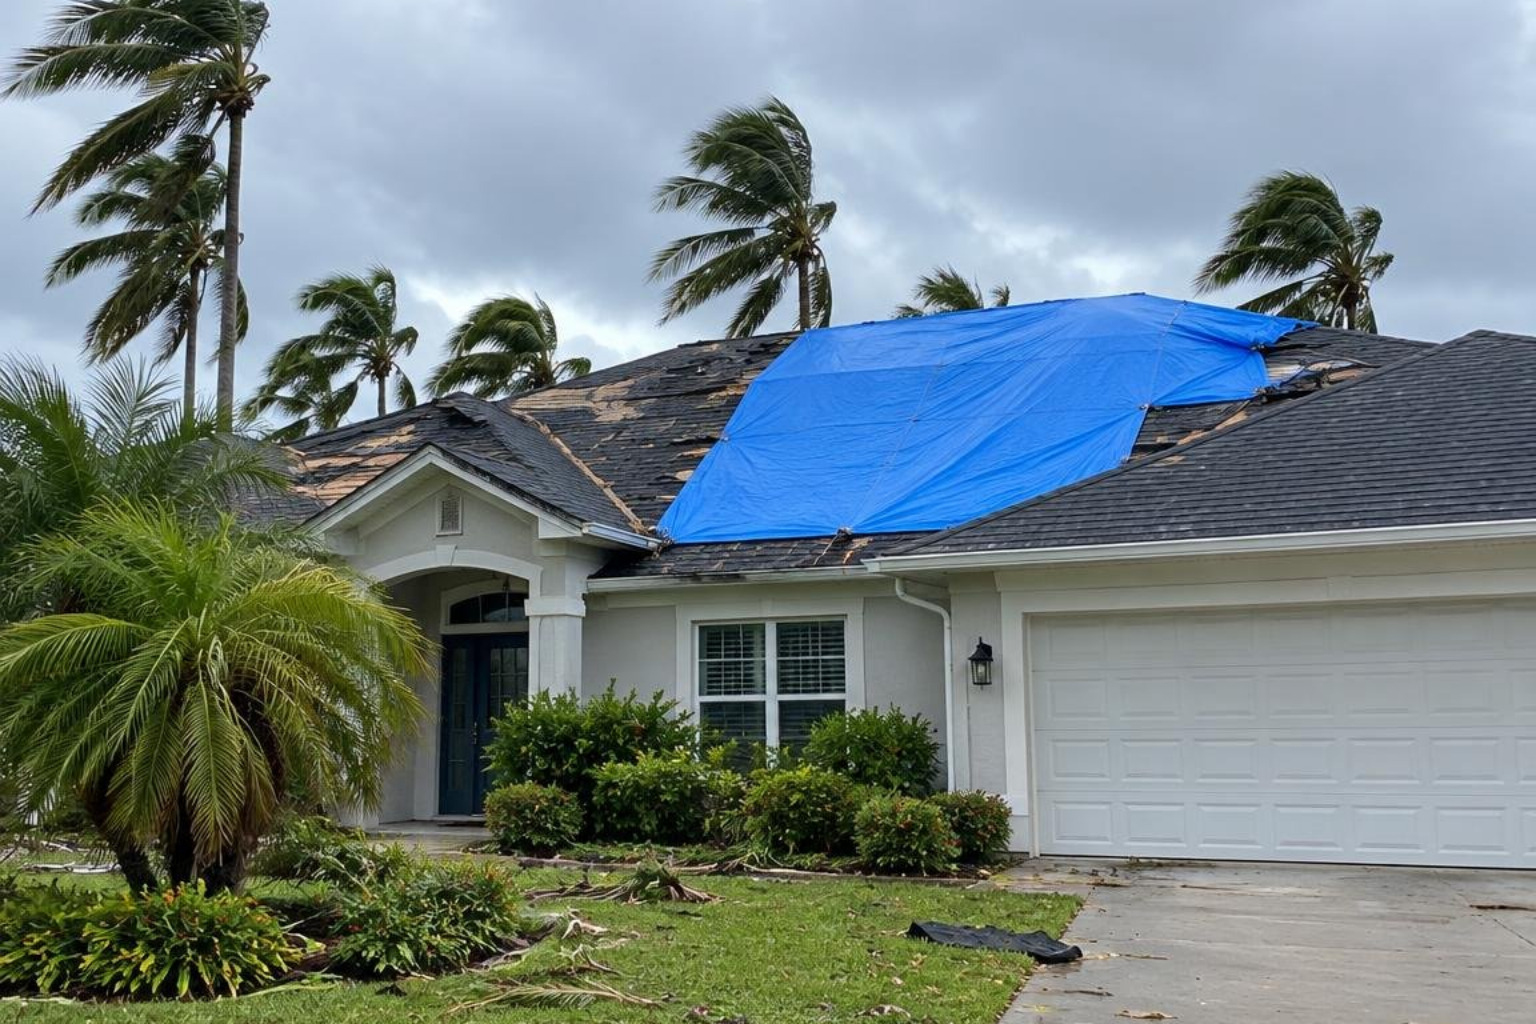
When you discover signs of storm damage, taking organized, swift action prevents minor leaks from escalating into severe interior structural damage or mold outbreaks.
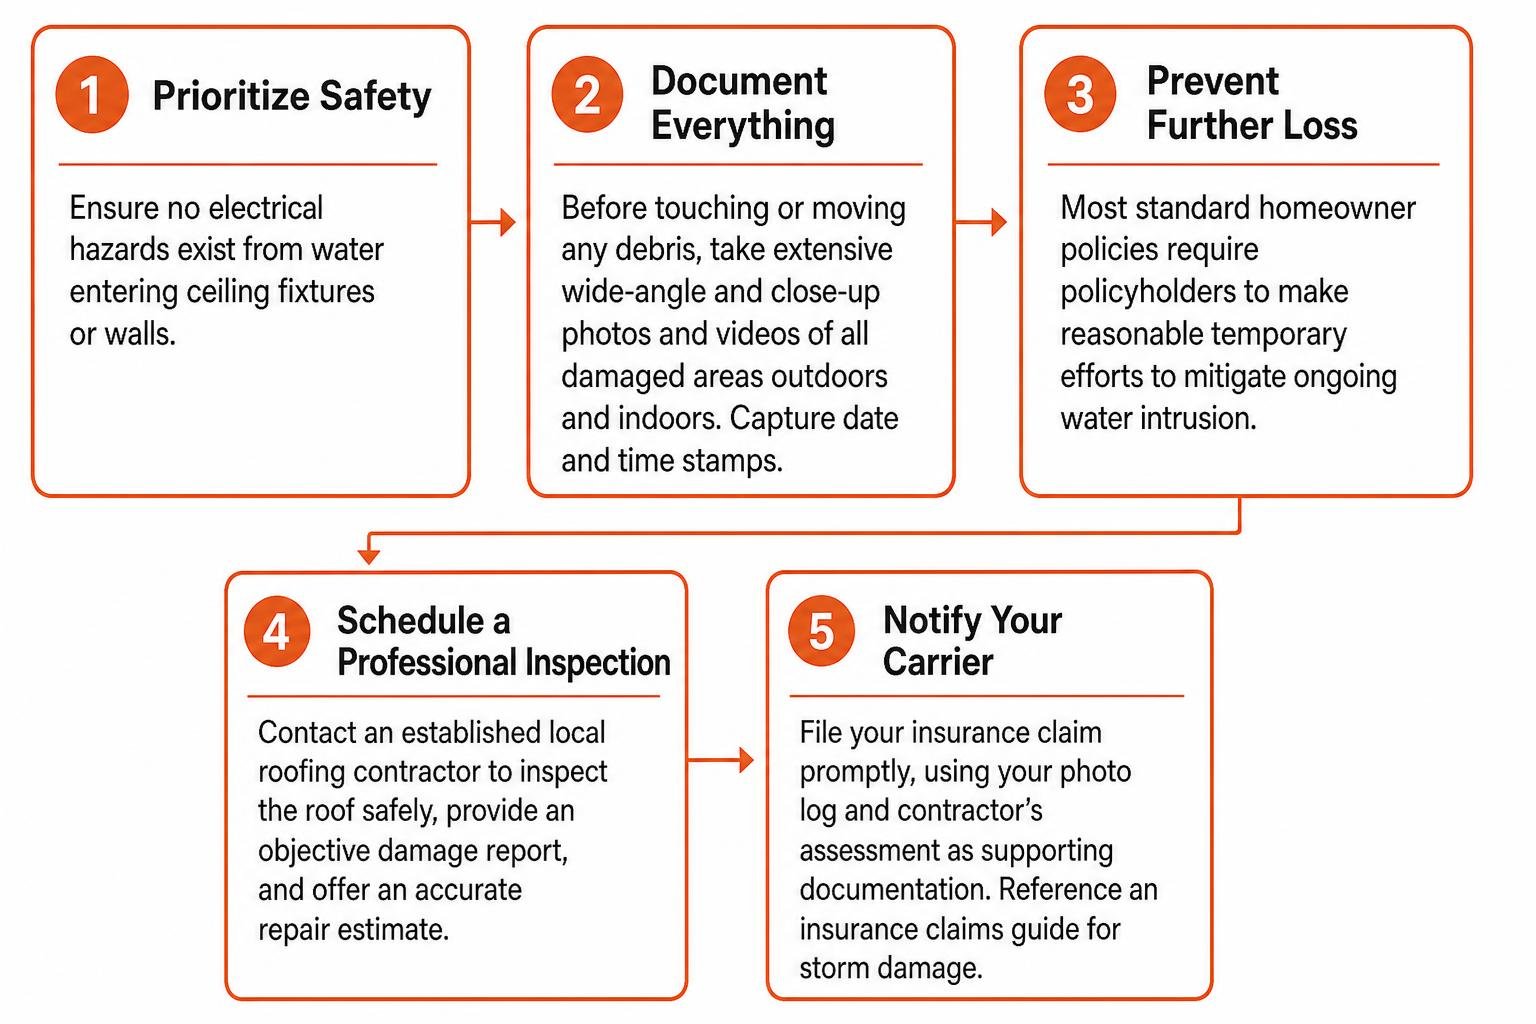
- Prioritize Safety: Ensure no electrical hazards exist from water entering ceiling fixtures or walls.
- Document Everything: Before touching or moving any debris, take extensive wide-angle and close-up photos and videos of all damaged areas outdoors and indoors. Capture date and time stamps.
- Prevent Further Loss: Most standard homeowner policies require policyholders to make reasonable temporary efforts to mitigate ongoing water intrusion.
- Schedule a Professional Inspection: Contact an established local roofing contractor to inspect the roof safely, provide an objective damage report, and offer an accurate repair estimate.
- Notify Your Carrier: File your insurance claim promptly, using your photo log and contractor’s assessment as supporting documentation. Reference an insurance claims guide for storm damage to better understand policy timelines and requirements.
Emergency Mitigation: When to Tarp vs. Call a Professional
If water is actively entering the home, temporary protection is critical. However, improper DIY tarping can damage surrounding shingles or create serious fall risks.
For small, accessible openings, homeowners often attempt short-term measures, but securing tarps in coastal wind environments requires specific methods. Fastening tarps with sandbags, 2×4 wooden battens, and screws through reinforced seams prevents the tarp itself from acting like a sail and tearing loose. For significant damage or high-slope roofs, arranging emergency roof tarping procedures ensures the opening is safely sealed with industrial-grade tarps or self-adhering membranes without causing further structural degradation.
Securing Fair Coverage from Your Homeowners Policy
Navigating insurance coverage after a major wind event requires an understanding of key policy terms and requirements:
- Deductibles: In Florida, storm claims often fall under specific hurricane or named-storm deductibles, which are typically calculated as a percentage (often 2% to 5%) of your home’s total insured value rather than a flat dollar amount.
- Actual Cash Value (ACV) vs. Replacement Cost Value (RCV): An ACV policy pays the depreciated value of your roof based on its age and condition at the time of loss. An RCV policy covers the actual cost to repair or replace the damaged sections at current market rates, paying out depreciation once work is completed.
- Ordinance or Law Coverage: Building codes evolve over time. If local building department requirements mandate modern upgrades during a repair, Ordinance or Law coverage helps cover those required modifications if included in your policy.
- Supplemental Claims: If hidden moisture or rotted decking is uncovered once old roofing materials are removed during repairs, an experienced contractor can submit supplemental documentation directly to your carrier adjuster to ensure all necessary work is accounted for.
Long-Term Prevention and Roof Fortification Strategies
Preventing future wind damage involves addressing the structural weak points of your roof before storms threaten the Space Coast. Investing in resilient building practices dramatically improves a home’s defense against severe weather.
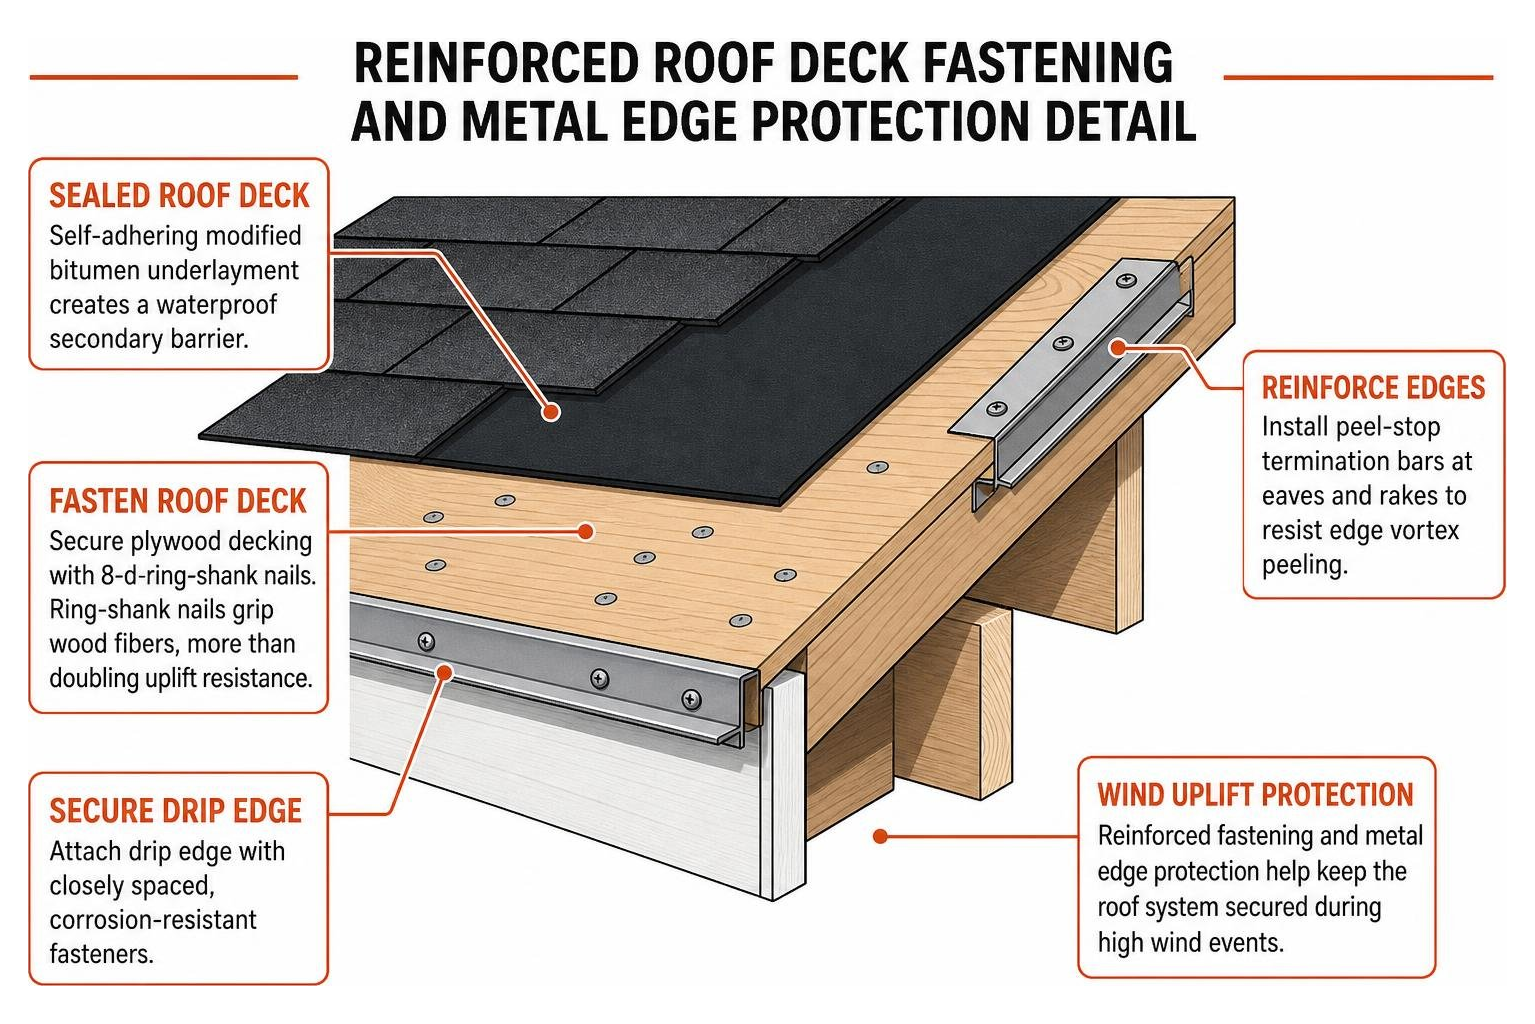
- Upgrade Roof Deck Fasteners: During a reroof, ensure the plywood decking is secured with 8-d ring-shank nails rather than smooth-shank nails or staples. Ring-shank nails feature small ridges that grip the wood fibers, significantly increasing uplift resistance.
- Install a Sealed Roof Deck: Applying a full layer of self-adhering modified bitumen underlayment directly to the wooden sheathing creates a waterproof secondary barrier. If wind tears away exterior shingles, this sealed deck keeps wind-driven rain out of the home.
- Reinforce Perimeter Metal and Flashing: Secure drip edges with closely spaced, corrosion-resistant fasteners, and incorporate peel-stop termination bars near eaves and rakes to resist edge vortex peeling.
- Choose High Wind-Rated Coverings: Select shingles with high wind resistance ratings or consider metal roofing designed for wind uplift protection.
- Maintain Surrounding Trees: Keep large limbs trimmed back at least 10 feet from rooflines to prevent mechanical scraping and eliminate falling branch impacts during high gusts.
Adhering to IBHS severe weather roofing best practices strengthens the entire building envelope, providing long-term reliability against recurring coastal storms.
Frequently Asked Questions About Roof Wind Damage
At what wind speed does a residential roof sustain damage?
Roof damage can begin at wind speeds between 40 and 50 mph. At these moderate speeds, winds can loosen aged metal flashing, detach loose edge trim, and lift the edges of older asphalt shingles whose factory sealant strips have dried out or degraded. When winds exceed 55 to 70 mph, even well-maintained shingles can experience tab creasing, tearing, and widespread uplift along eaves and ridges.
Will homeowners insurance cover roof replacement after a windstorm?
Coverage depends entirely on your specific policy language, roof age, deductible structure, and the extent of sudden damage caused by a covered storm peril. If wind creates a substantial opening or damages a major portion of the roof covering, insurance often covers necessary repairs or full replacement under Replacement Cost Value terms. However, carriers frequently exclude gradual wear, cosmetic blemishes, or pre-existing maintenance issues, requiring clear documentation proving the loss was sudden and storm-induced.
Can I repair individual wind-damaged shingles or is full replacement needed?
Whether a roof requires targeted repairs or a complete replacement depends on the overall extent of the damage, the age and flexibility of the existing shingles, permitting history, current code requirements, and local building department guidance. If only a few shingles were torn away on a relatively new roof, isolated tab replacement and re-sealing may be entirely effective. However, on older roofs where surrounding shingles have become brittle from Florida heat and UV exposure, lifting adjacent shingles to make patch repairs can cause them to crack and break. In such cases, or where wide sections across multiple slopes have lost their adhesive seal, replacement often proves to be the most cost-effective and dependable long-term solution.
Conclusion
High winds from tropical systems, squall lines, and sudden thunderstorms pose an ongoing challenge for homeowners across Brevard County, FL. Recognizing subtle signs of damage early—such as unsealed shingle tabs, granule accumulation near downspouts, and minor attic moisture spots—prevents small leaks from expanding into costly structural issues.
When severe weather impacts your home in communities like Melbourne, Palm Bay, Rockledge, Viera, or Cocoa, rely on professional support rather than taking safety risks on a damaged roof. MLG Roofing provides comprehensive evaluations, insurance documentation assistance, and dependable professional roof repair services tailored to protect Space Coast homes for years to come.